Movement Execution
The primary control for executing robot motion. Use single click for incremental steps or the submenu for full automation. Double click on the play will perform the full automation as well.
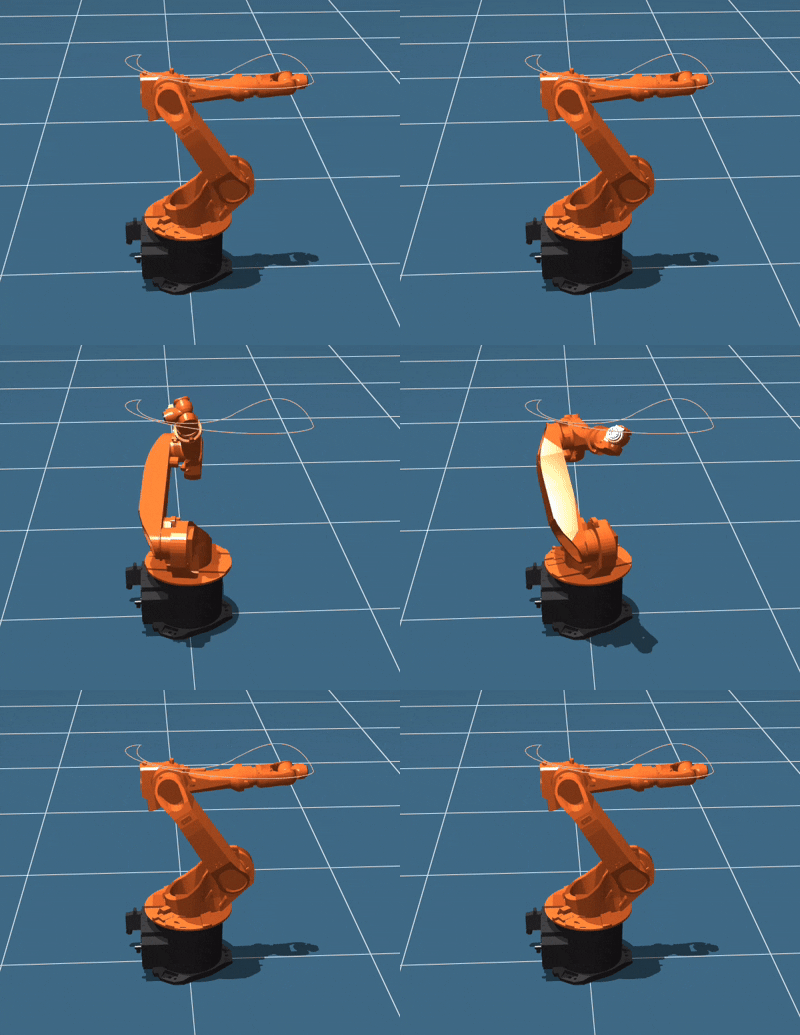
Posture Queue [0/0]
Manage the sequence of movements for the robot arm. The counter displays your active position versus total positions.
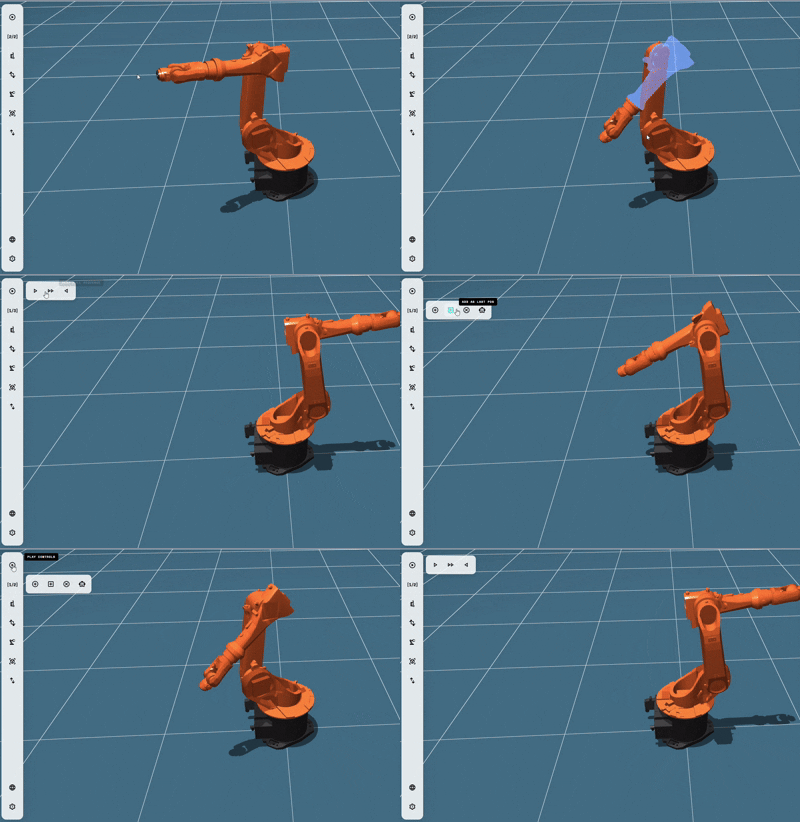
Pick and Place Logic
Operational Flow
To interact with objects in the scene, follow this logic strictly:
- 1. Create a standard position as a "safe start".
- 2. Move arm to the object using Gizmos or IK.
- 3. Use Add Position, then select your interaction:
Interactive Controls
Mouse And Keyboard
Direct Kinematics: Click and drag joints with the mouse.
Inverse Kinematics (IK): Hold SHIFT while dragging to solve for position.
Object Movement: Click any .stl to reveal the 3D Gizmo for relocation.
Linear rail: Drag the rail carriage to slide the arm along the rail. Hold SHIFT while dragging and only the base moves: the manipulator keeps its exact world position (X, Y, Z) and orientation (Rx, Ry, Rz), the joints are re-solved for every step. Where the pose cannot be reached from the new base position inside the joint limits, the carriage stops instead of letting the tool drift.
View: Drag the background to orbit, use the wheel to zoom. Hold SHIFT and drag the background to move the view center in X / Y, hold ALT (Option on Mac) and drag for its height (Z); the scene follows the mouse. Adding a second arm centers the view between the arms, Center the view in Settings brings the center and the zoom back to their defaults, and the view center is saved with the workspace.
Joint Conventions
The simulator counts every joint positive counter-clockwise about its axis vector, with zero at the model's home pose. Real controllers differ in sign and zero, so each .rob row carries a mapping real = sign · sim + offset (columns 14 / 15: sign, offset in degrees). Every joint angle that crosses the plugin API - getCurrentJointAngles(), worldToJointAngles*(), jointAnglesToWorld*(), postures, trajectory deltas, limits - is in the real convention; getJointAnglesMapping() / setJointAnglesMapping() read and change the mapping at run time (e.g. [{sign: 1, offset: 0}, {sign: -1, offset: -Math.PI/2}, {sign: -1, offset: Math.PI/2}, …] for a KUKA whose home is the candle pose).
Joint Limits
Each robot's .rob file carries the manufacturer's joint angle range (columns 12 / 13, degrees, real convention) of every joint; the simulator derives its own limits through the mapping. Dragging a segment stops at its limit, the joint sliders span the limits, and IK solutions outside them are rejected (the pivot gizmo stops, Apply XYZ finds another solution or none). Plugins can read the limits with getRobotJointLimits(), check a posture with isPostureValid(), and simulateRobotMotion() refuses a trajectory that would leave them. Models whose limits are not the manufacturer's values report a warning in the console when loaded.
Movement Types
Each posture in the queue carries how the arm travels from it to the next posture (Posture Queue → Posture Info): a Line set on posture 1 is the move between postures 1 and 2, and the last posture's type closes the loop back to the first. Free Move interpolates the joint angles with a trapezoidal velocity profile; Line, Arc (radius, plane normal, short / long, CW / CCW) and 3D Curve (a spline through user mid points) move the tool centre point along that path in world space with the orientation blended from the start to the end posture, solving the joints per step.
The same window sets per posture a dwell time (seconds the arm pauses once the posture is reached), a velocity 0..1 for the move that starts at it (or "Use default" = the global velocity from Settings) and Plugin Action Execute: the action belongs to that posture. When the running simulation reaches a flagged posture it stops there, the plugin's async function userAction(robotIdx, postureIdx, velocity, dwellTime, gcodeString) is called, and the simulation continues (with the posture's dwell, then the next move) only after it has returned. A run that starts at a flagged posture calls its action first.
gcodeString is the text of the posture's G-Code or Custom Action box (enabled only with Plugin Action Execute), so a plugin can forward G-code lines or any custom command to a controller. In moveParams / getPostureMoveType() these are dwell, velocity (null = default), pluginAction and gcodeString. Everything is saved in the .brw workspace file.
From a plugin: In the plugin API the type is the integer enum brwAPI.MoveType = { FREE: 1, LINE: 2, ARC: 3, CURVE: 4 }: addRobotPosture(jointAngles, index, robotIdx, moveType = 1, moveParams) takes it as an optional fourth argument (default Free Move) with moveParams = { radius, normal: [x, y, z], long, cw } for an arc or { points: [[x, y, z], …] } (world, mm) for a curve; getPostureMoveType(index, robotIdx) returns { moveType, radius, normal, long, cw, points } and setPostureMoveType(index, moveType, moveParams, robotIdx) changes an existing posture.
Kinematics & Coordinates
Joint Control
Set specific angles for each robot joint within its physical range. The system uses inverse kinematics calculations to position the arm.
Joint Lock / Unlock
Each joint in the 3D control panel can be toggled between two modes:
XYZ Coordinates
Work in world coordinates relative to robot reach. Click any imported .stl object to use the from object option via the appearing gizmo.
Access the XYZ coordinate window here. Note: All workspace windows are draggable and can be positioned anywhere in your browser.
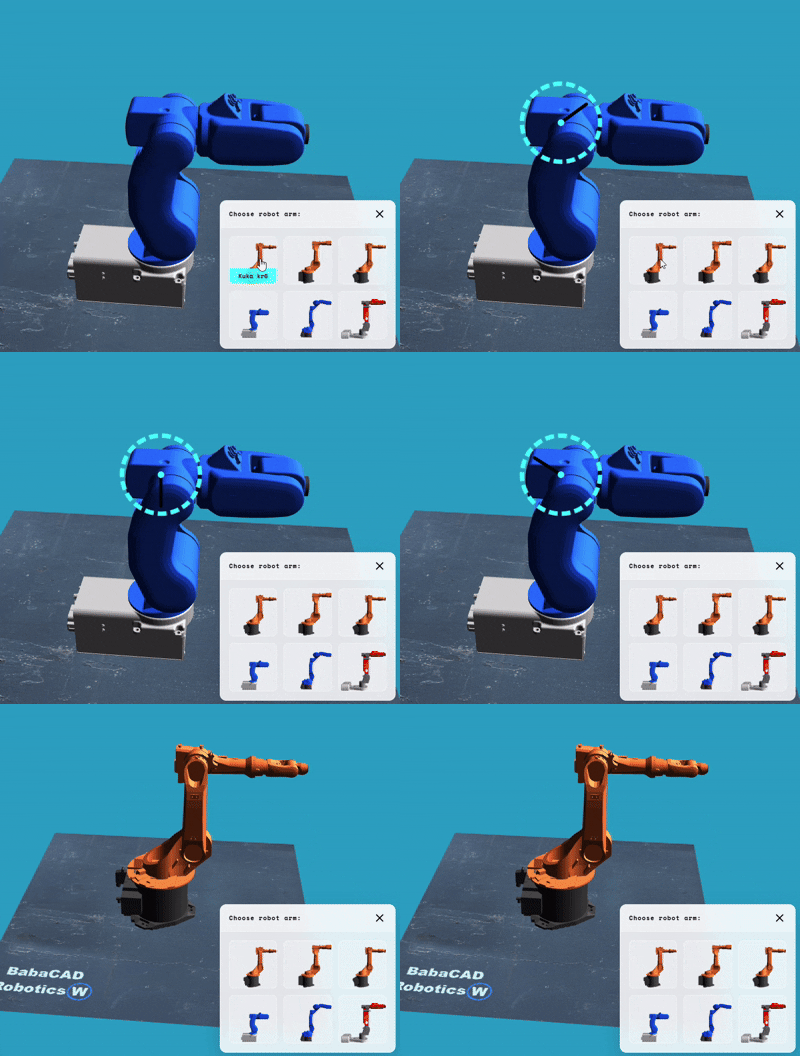
Robot Library
Choose from a growing library of professional robot arms. Selecting a model will instantly replace the active arm in the scene while maintaining your coordinate space; with several arms loaded, the other arms are untouched (see Multiple Robot Arms).
- • Yaskawa / MotoMini
- • KUKA Models
- • Universal Robots & more
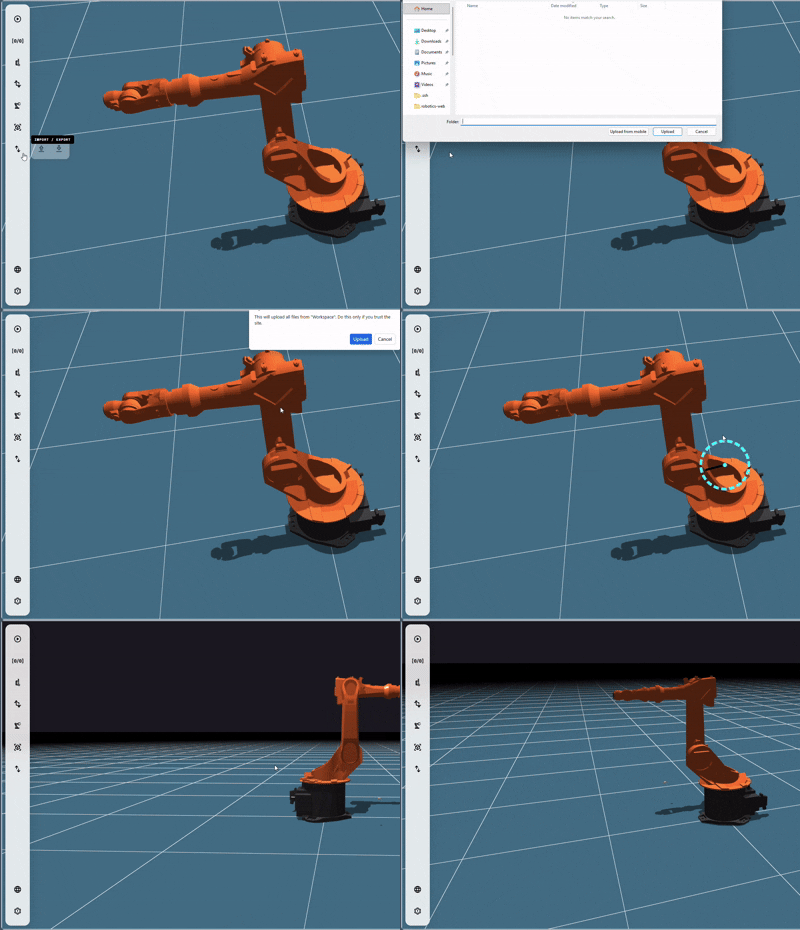
Import / Export Workspace
Save and restore your entire workspace including the robot configuration and all imported objects. The workspace is stored as a .brw file.
Object Highlighting
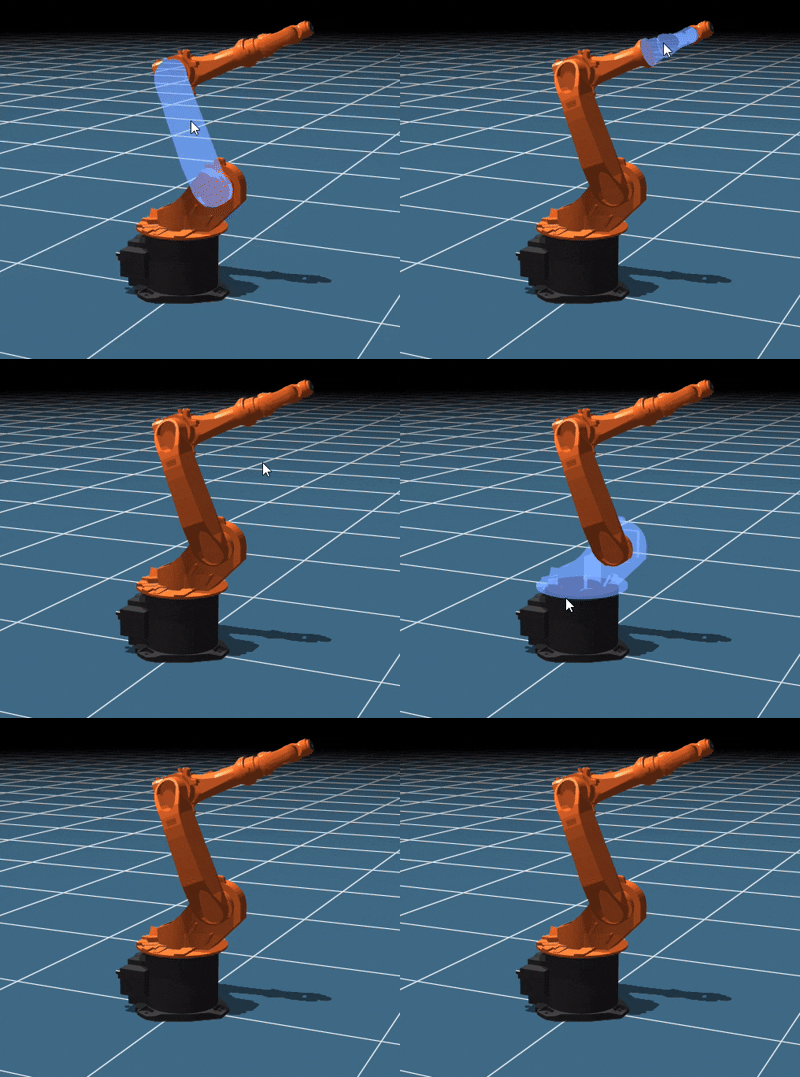
When manipulating objects in the scene, the active object is now visually highlighted so you can clearly see which item you are interacting with. This improves precision when working with multiple objects in close proximity.
Scene & System
Object Management
Robot Library
Click precision_manufacturing to swap the active arm's model (KUKA, Yaskawa, etc.), add or remove arms and set their base positions.
Configuration
- • Velocity: Control arm movement speed (default 0.35).
- • Show Pivot/Path: Visualize the joint gizmos and the movement trajectory.
- • Language: Multi-lang support (EN, DE, IT, FR, ES, ZH, JP).
- • Dark Mode: Switch the interface between the light and dark themes.
Multiple Robot Arms
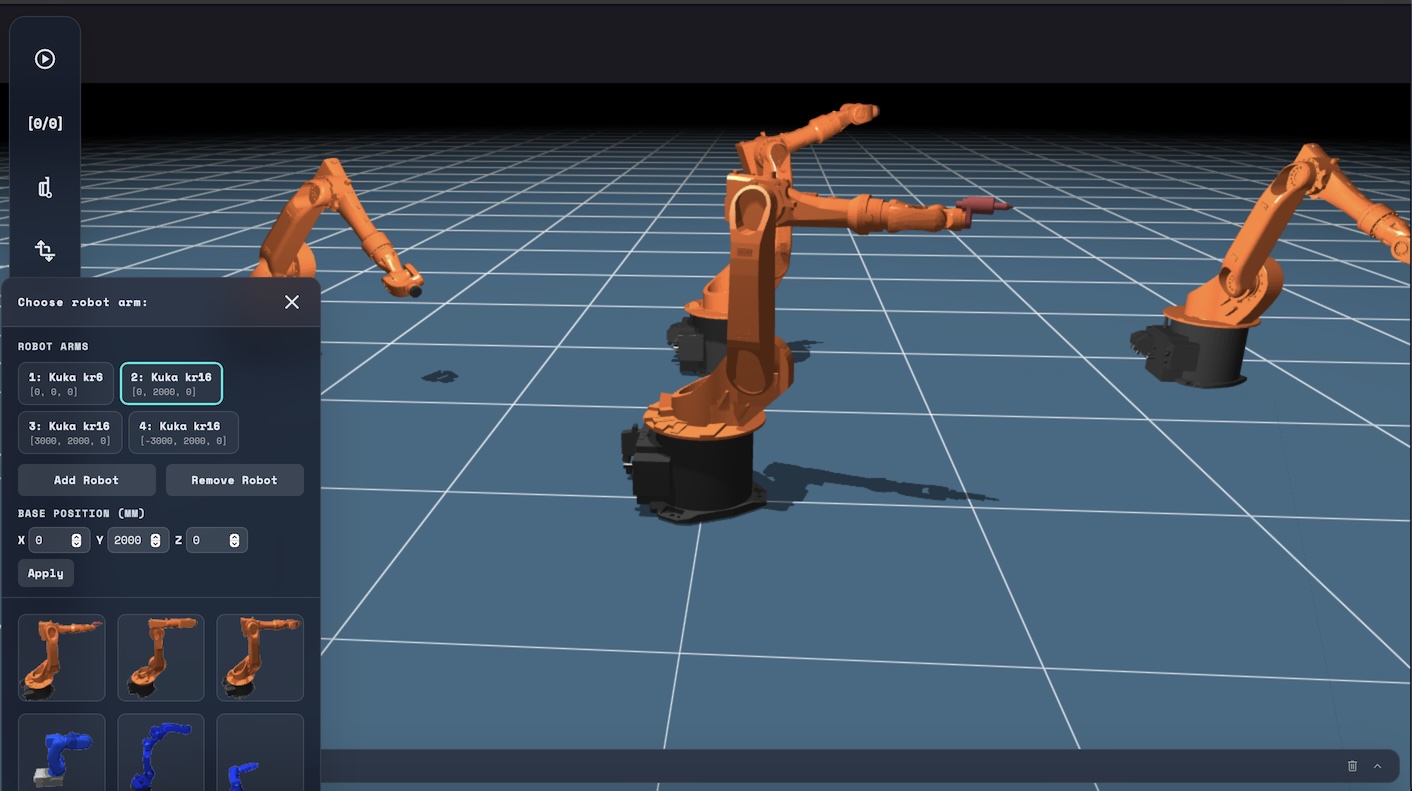
A scene is no longer limited to one arm. Add as many robots as the cell needs, place each one at its own base position and program them side by side - from the interface or from a plugin. Below, two arms driven by one plugin, with the console reporting the run.
Arms And Slots
Each arm is a slot with its own model, base position, posture queue, trajectory and pick & place state. Workspace objects are shared, so two arms can hand parts to each other.
Open precision_manufacturing Robot Model: the chips at the top of the window list the arms as 1: Model [x, y, z]. The outlined chip is the active arm - the one the joint / XYZ controls, the posture queue, pick & place and the plugin API act on. Click a chip, or click any part of an arm in the viewport, to make it active.
.brw) and restored on import.Working With Several Arms
- 1. Pick a model in the gallery: it replaces the model of the active arm only.
- 2. Queue postures per arm as usual; the [current/total] counter follows the active arm.
- 3. Play Full Sequence runs every arm that has postures at the same time. Play Once and Play Back step the active arm only.
- 4. Pick & place is per arm: select the object, then pick / drop on the active arm's postures. An object carried by one arm is drawn with that arm.
- 5. XYZ coordinates, tool normals and every world position in the API are absolute scene coordinates, i.e. they include the arm's base position and base rotation; forward and inverse kinematics convert to and from the arm's own frame.
Workspaces (.brw, version 2.1) save all arms with their base positions, postures and pick & place. Older single-arm files still load as one arm at the origin.
From A Plugin
Robot-related API calls take an optional trailing robotIdx. Arms play concurrently, so start each one and they move together:
// second arm 1.5 m along X, same model as the active one
const b = await brwAPI.addRobotArm(-1, [1500, 0, 0]);

for (const k of [0, b])
{
  const q0    = await brwAPI.getCurrentJointAngles(k);
  const start = await brwAPI.getCurrentWorldPosition(k); // base included
  const path  = await brwAPI.worldToJointAnglesBatch(wpos(start), q0, null, k);
  await brwAPI.simulateRobotMotion(steps(path), k);       // returns at once
}Tools
Attaching A Tool
Open view_in_ar Tools & Objects → Tools. Import tool .stl reads one or several STL files into the tool list (named after the file). Select a tool in the list and press Attach Tool: it replaces the arm's default end effector (the 7th part of the model) and the arm's tool point moves to the tool offset - dx / dy / dz from the flange, which take the place of the 7th row of the robot's .rob file. Kinematics, the XYZ read-out, the drawn path, the pivot gizmo and pick & place all work at the tool point. Detach Tool puts the original end effector and offset back.
Model a tool with its attach point at the origin and pointing along +X; on attach it is moved to the flange (the sum of the model's joint translations, rows 1 … 6). With no tool attached, the offset fields show the .rob values read-only; with a tool they and the colour picker edit the attached tool at once.
Saved With The Workspace
The tool list (names and STL file names) and each arm's attached tool with its offset and colour are written to the .brw; on import the STLs are read from the workspace folder by name, like the other objects, and re-attached. Keep the tool STL files next to the .brw.
From A Plugin
getToolNames() lists the imported tools, attachRobotTool(name, offset, color, robotIdx) mounts one (replacing a mounted tool), detachRobotTool() removes it, setRobotToolOffset() / setRobotToolColor() edit it and getRobotToolInfo() reads it back. A plugin cannot read files, so tools are imported in the Tools window or come with the workspace.
const tools = await brwAPI.getToolNames();          // e.g. ['gripper', 'welder']
await brwAPI.attachRobotTool('welder', [150, 0, 0]); // tool point 150 mm from the flange
// ... run the path ...
await brwAPI.detachRobotTool();External Axes
Linear Rail
Open view_in_ar Tools & Objects → External Axis. The window works on the active arm and has two panels. The top one is a linear rail: base position (bottom of the rail, at its start, centred on the profile), the translation vector the carriage moves along, and the profile width / height plus the length. Add linear axis generates the rail base and its carriage and puts the arm on the carriage - the arm's base becomes the rail start, one rail height up.
Drag the carriage in the viewport to move it (the arm rides along); it stops at the rail ends (0 … L). Hold SHIFT while dragging to keep the manipulator where it is: the base slides along the rail, but the tool keeps its world position and orientation (the joints are re-solved each step, and the carriage stops where the pose would leave the joint limits or the reach). Each arm can have one rail; Remove axis takes it away and leaves the arm where it stands.
Rotary Table
The bottom panel adds a rotary table (external positioner): base position, rotation Rx / Ry / Rz of the table, radius and height. Import workpiece STL puts a part on the turntable, one table height above the base, centred on the rotation axis, and the colour picker sets its colour (saved with the workspace). Drag the turntable or the workpiece to turn them together; the table does not move the arm.
Once an axis exists its fields are read-only. The lock chip next to the arm name (as in Joint Control) unlocks them: every change is applied at once - the rail or table is rebuilt, the carriage keeps its travel and the arm stays on it.
Postures And Simulation
When an arm owns an external axis, a saved posture carries the rail travel, the table angle and the arm's base position along with the six joint angles. Playing the queue then moves the rail, the whole arm and the turntable together with the joints: every axis follows a trapezoidal velocity profile over the same number of steps, so they start and stop together, and the velocity setting applies to all of them. The drawn path follows the arm along the rail.
Rails and tables are saved in the workspace (.brw) and rebuilt on import; the workpiece STL is loaded from the workspace folder by name, like the other objects.
From A Plugin
addLinearRail() / addRotaryTable() create the axes (a rail has a base position and a rotation rot: [rx, ry, rz], composed Rx·Ry·Rz like the robot base; its travel direction dir is the rotated +X and is returned by getLinearRail(); the robot is mounted on the carriage, so moving or rotating the robot base takes the rail along and rotating the rail turns the robot), setRailPosition() (mm) and setRotaryTableAngle() (degrees) move them, and simulateRobotMotion(jointSteps, robotIdx, railSteps, tableSteps) plays joints, rail and table together - one delta per step, rail in mm, table in degrees, shorter arrays padded with zeros. Postures from getRobotPostureArray() carry [j0..j5, travel, angle (rad), bx, by, bz] and trajectory steps from getRobotTrajData() carry the rail / table deltas as elements 6 and 7 when an axis exists; the workpiece STL can only be attached in the interface.
// rot = [rx, ry, rz] in degrees, or dir: [tx, ty, tz] instead;
// with neither the rail is aligned with the robot base
await brwAPI.addLinearRail({
  basePos: [0, 0, 0], rot: [0, 0, 0],
  W: 500, H: 300, L: 3000
});

const q0    = await brwAPI.getCurrentJointAngles();
const steps = 100;
const rail  = Array(steps).fill(2000 / steps);   // 2 m along the rail
const table = Array(steps).fill(90 / steps);     // a quarter turn

await brwAPI.simulateRobotMotion([], undefined, rail, table); // joints stayPlugin System
What It Is
Plugins let you drive the arm from your own JavaScript instead of clicking through the interface. Use them to generate toolpaths, batch postures, or run a whole routine unattended. Your code runs in a sandboxed Web Worker, so it has no access to the page; it reaches the application only through the injected brwAPI object.
Loading a Plugin
- 1. Put
brw-plugin.jsin a folder, on its own or beside a.brwworkspace. - 2. Open swap_vert Import / Export and select that folder.
- 3. Run it with one of the three command buttons.
userCommand(1), (2) or (3).A workspace is optional. If you only want the plugin commands, a folder
holding nothing but brw-plugin.js loads fine. Selecting a folder with
neither file shows a message instead.
Entry Point
Your file must define userCommand. The argument tells you which button was pressed, so a single plugin can carry three separate routines:
async function userCommand(cmdId)
{
  brwAPI.logMessage('Plugin started');

  const q0    = await brwAPI.getCurrentJointAngles();
  const start = await brwAPI.getCurrentWorldPosition();
  const vel   = await brwAPI.getSimulationVelocity();

  if (cmdId == 1)
  {
    // ...build a path, then play it back:
    await brwAPI.simulateRobotMotion(simDataArr);
  }
}
Every brwAPI call is asynchronous. Each one is forwarded to the application and resolved back to the worker, so it must be awaited.
Install the BabaCAD Robotics VS Code extension for API auto-complete.
Running A Command
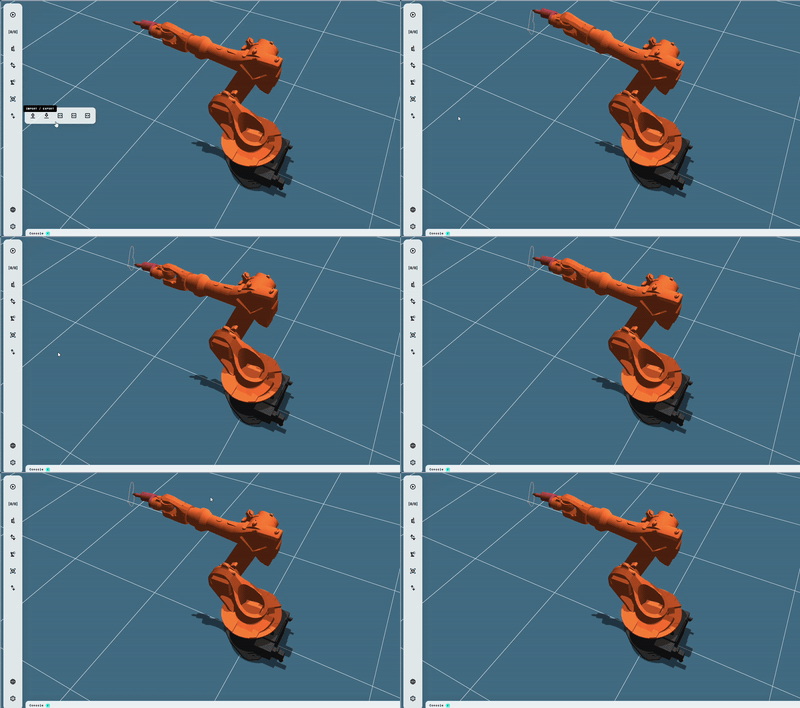
Pressing a command button runs your userCommand straight away,
against the arm as it currently stands. Here command 1 traces a heart at
the tool, with the console reporting each stage as it goes.
Nothing is queued into the posture list, so a plugin can be re-run as often as you like while you tune it.
API Reference
Robot-related calls take an optional trailing robotIdx (the arm's slot index, 0-based); when omitted they act on the active arm. World positions and normals are absolute and include the arm's base position and rotation; addRobotArm(modelIdx, basePos, baseRot), getRobotBaseRot() and setRobotBaseRot() use [rx, ry, rz] in degrees. The ten *Robot* calls after getCurrentNormalVector() manage the arms themselves: count, active arm, model, add / remove and base position.
logMessage()
worldToJointAngles()
worldToJointAnglesBatch()
jointAnglesToWorld()
jointAnglesToWorldBatch()
getCurrentJointAngles()
getCurrentWorldPosition()
getCurrentNormalVector()
getRobotCount()
getActiveRobotIdx()
setActiveRobotIdx()
getRobotModelNames()
getRobotModelIdx()
setRobotModelIdx()
addRobotArm()
removeRobotArm()
getRobotBasePos()
setRobotBasePos()
getRobotBaseRot()
setRobotBaseRot()
getLinearRail()
addLinearRail()
removeLinearRail()
getRailPosition()
setRailPosition()
getRotaryTable()
addRotaryTable()
removeRotaryTable()
getRotaryTableAngle()
setRotaryTableAngle()
getToolNames()
getRobotToolInfo()
attachRobotTool()
detachRobotTool()
setRobotToolOffset()
setRobotToolColor()
getWorkspaceObjectPos()
setWorkspaceObjectPos()
rotateWorkspaceObject()
getWorkspaceObjectRotationAngles()
setWorkspaceObjectRotationAngles()
getWorkspaceObjectTransformMatrix()
setWorkspaceObjectTransformMatrix()
getWorkspaceObjectNormal()
setWorkspaceObjectNormal()
findWorkspaceObjectsByName()
getWorkspaceObjectName()
getWorkspaceObjectCount()
pickWorkspaceObject()
dropWorkspaceObject()
addRobotPosture()
removeRobotPosture()
getPostureMoveType()
setPostureMoveType()
simulateRobotMotion()
getRobotJointLimits()
isPostureValid()
getJointAnglesMapping()
setJointAnglesMapping()
getRobotTrajData()
getRobotPostureArray()
getRobotCurrentPostureIdx()
getSimulationVelocity()
sendDataToSerialPort()
A complete worked example ships as plugin/brw-plugin.js. It draws rectangles and circles in multiple passes down the Z-axis.
Console
Plugin Output
Anything a plugin passes to logMessage() is printed to the console docked along the bottom of the workspace, so you can follow a run without opening the browser's developer tools.
brwAPI.logMessage('Pass ' + i + ' of 4 complete');Objects and arrays are formatted as JSON, everything else is printed as text. Each line is timestamped and the view follows the newest entry.
Controls
The console is always docked and starts collapsed to its title bar. Click the bar, or the chevron, to expand it.
While collapsed, incoming messages raise a counter on the title bar rather than opening the panel, so a running plugin never pulls focus from the scene. The most recent 500 lines are kept.
Serial Port
Talking To Real Hardware
A plugin can push data out over a serial connection while the simulation runs, so the same routine that moves the arm on screen can drive a real controller, a gripper, or any device listening on the port.
Connecting
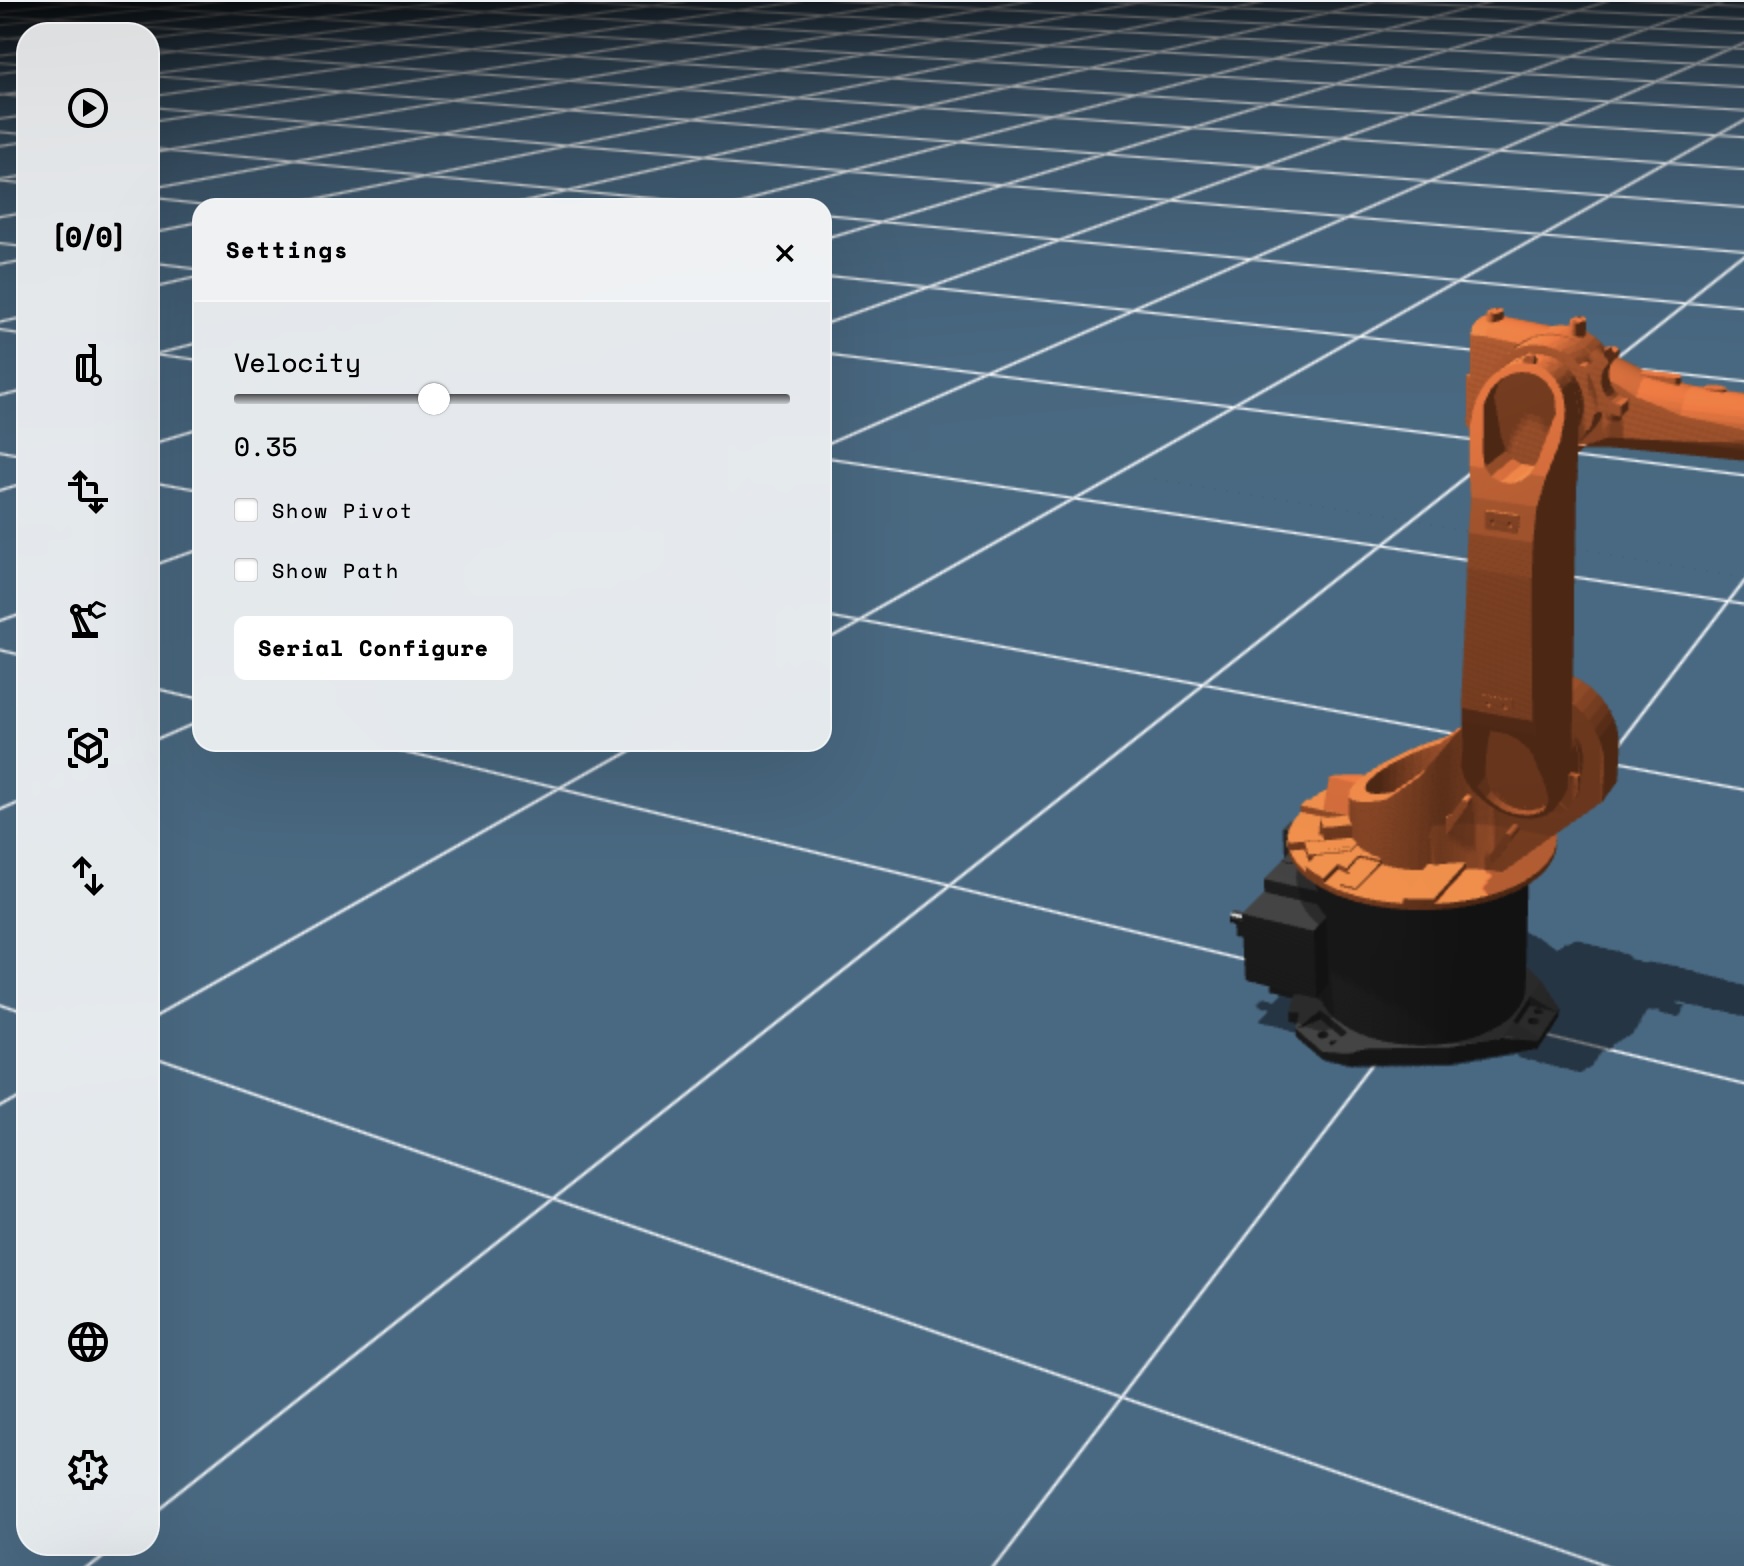
Open settings Settings and press Serial Configure to choose a port. Until a port is connected nothing is transmitted, and calls to the API are simply ignored.
Sending From A Plugin
One call does the work. It takes a string, so format the payload however the device on the other end expects, including any line terminator.
// stream the live joint angles out as degrees
const q   = await brwAPI.getCurrentJointAngles();
const deg = q.map(a => (a * 180 / Math.PI).toFixed(2));

await brwAPI.sendDataToSerialPort(`J ${deg.join(' ')}
`);
Combined with simulateRobotMotion, this lets a plugin play a path in
the viewport and mirror it to hardware in the same pass.
Global Settings & Support
Language Support
BabaCAD Robotics supports a wide variety of localizations, accessible via the language icon:
Configuration & Info
Velocity: Adjust movement speed slider.
Show Pivot/Path: Toggle visualization of the robot's gizmo and trajectory path.
Dark Mode: Switches the whole interface between the light and dark themes. Your choice is remembered on this machine and restored on the next visit.
Center the view: Resets the view center (to the origin for one arm, to the middle of the arms for several) and the zoom to the robot model's defaults, after panning with Shift / Alt + drag or zooming with the wheel.
Info: Access system versioning and the Discord Link for support.