BabaCAD Robotics Web edition is now available as a free, web-based (runs in a browser), cross-platform robotic arm simulation, offline programming (OLP) robotic arm control software. Choose from a list of popular industrial robots like KUKA, Yaskawa (Motorman), Fanuc etc.
Industrial robot arm simulation software helps robotics engineers to simulate and setup robot tasks before robot is running in a real plant environment. With BabaCAD Robotics Web user will be able to set from simple pick and place robot tasks up to complex tasks like robot tool precise 3D trajectory tracking in the robot workspace. You can choose from the list of popular industrial robots like KUKA, Fanuc, Motoman (Yaskawa) etc. List of robot arms will be frequently updated. Not just simulation but also real-time robot arm control will be available using BabaCAD Robotics Web. Only that you need is browser enabled device like computer, tablet or even mobile phones. This web version also has touch screen input enabled, feature that is rarely found in other robotics simulation and control software. Every robot model chosen in simulation has integrated real-time direct and inverse kinematics solver, so user can move and plan robot end-effector trajectory using several input modes. Robot can be moved in joint (joint angles) and xyz (world cartesian coordinates) workspace just by moving your mouse or you can use slider buttons. If you have just 3 minutes of your time, please watch intro video of the first version v1.0 of BabaCAD Robotic Web Edition here:
För att vara mer exakt är det nästan 100% gratis (kan vi säga 95% gratis). Hur kan det vara?
Det beror på att denna CAD är ungefär tjugo gånger billigare än de andra professionella CAD-verktygen (som AutoCAD, SolidWorks etc).
Tja, AutoCAD är bäst i klassen, men om du kan köpa en professionell CAD för 1/20 av priset på AutoCAD och öppna / redigera AutoCAD-filer (DWG, DXF), och om du kan avsluta allt arbete, varför varför skulle någon slösa pengar onödigt.
BabaCAD stöder alla .DWG-ritfiler upp till R 2020, så det är 100% kompatibelt med all annan professionell CAD-programvara.
Gå till startsidan (https://www.babacad.com), ladda ner programvaran och prova det nu gratis.
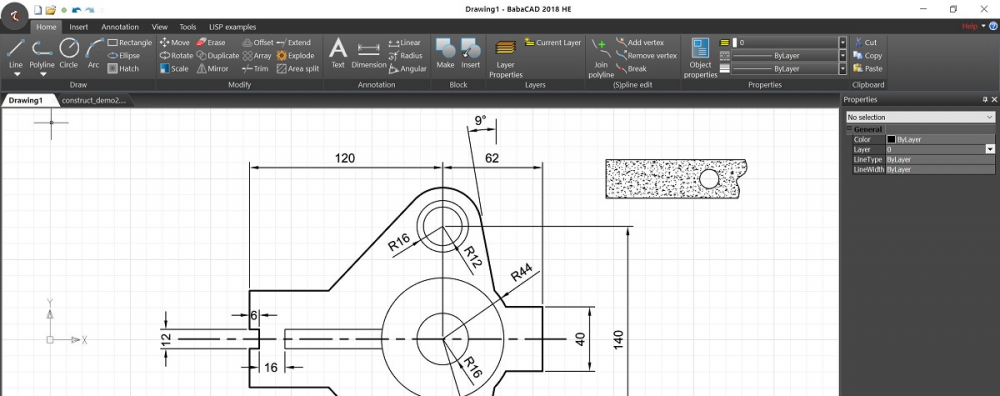
Rita en linje, båge, cirkel, rektangel, polyline, eller använd modifiera verktyg och rita mer komplexa föremål som block, spline, lucka och så vidare.
Gruppera objekt med block, lager och välj mellan olika linjevikter och linjetyper.
Importera block från enorma bibliotek med block i DWG- och DXF-filer som finns på internet.
I slutet, rita dimensioner, kommentarer, text, infoga rasterbilder och mycket mer.
Det finns många videohandböcker på hemsidan, började från att göra en enkel 2D-plan i CAD, importera skisser, plotta i skala med layouter och mycket mer.
Om du vill starta CAD-modellering i 3D, finns det 3D Enterprise-version med de grundläggande 3D-modelleringsverktygen som Extrude, filé, Chamfer, hål etc.
Enterprise-versionen kan utökas med dina egna kommandon och funktioner genom att programmera BabaCAD .NET AddOn-moduler med VisualBasic eller C # och .NET-komponenter i Microsoft Visual Studio. Exempelprojekt ingår i paketet.
Per essere più precisi, è quasi al 100% gratuito (possiamo dire 95% gratuito). Come può essere
È a causa del fatto che questo CAD è circa venti volte più economico degli altri strumenti CAD professionali.
Bene, Auto CAD è il migliore della categoria, ma se puoi acquistare un CAD professionale per 1/20 del prezzo di prof. CAD e aprire / modificare i file CAD (DWG, DXF), e se riesci a finire tutto il lavoro, perché qualcuno sprecherebbe denaro inutilmente.
BabaCAD supporta tutti i file di disegno .DWG fino a R 2020, quindi è compatibile al 100% con tutti gli altri software CAD professionali.
Vai alla pagina iniziale (https://www.babacad.com), scarica il software e provalo subito gratuitamente.
Disegna una linea, un arco, un cerchio, un rettangolo, una polilinea o usa strumenti di modifica e disegna oggetti più complessi come blocchi, spline, tratteggio e così via.
Raggruppa oggetti usando blocchi, livelli e scegli tra diversi spessori e tipi di linea.
Importa blocchi da una vasta libreria di blocchi in file DWG e DXF che possono essere trovati su Internet.
Alla fine, disegna dimensioni, annotazioni, testo, inserisci immagini raster e molto altro.
Esistono numerosi tutorial video sulla home page, iniziati dalla creazione di una semplice planimetria 2D in CAD, dall’importazione di schizzi, dalla stampa in scala utilizzando layout e molto altro.
Se vuoi iniziare la modellazione CAD in 3D, esiste la versione 3D Enterprise con gli strumenti di modellazione solida 3D di base come Estrudi, Raccordo, Smusso, Fori ecc.
La versione Enterprise può essere estesa con i propri comandi e funzioni programmando i moduli AddOn di BabaCAD .NET utilizzando VisualBasic o C # e componenti .NET in Microsoft Visual Studio. I progetti di esempio sono inclusi nel pacchetto.
Para ser mais preciso, é quase 100% gratuito (podemos dizer 95% grátis). Como pode ser?
Isso ocorre porque esse CAD é cerca de vinte vezes mais barato que as outras ferramentas profissionais de CAD.
Bem, o Auto CAD é o melhor da classe, mas se você pode comprar um CAD profissional por 1/20 do preço do prof. CAD e abrir / editar arquivos do CAD (DWG, DXF), e se você pode concluir todo o trabalho, por que alguém desperdiçaria dinheiro desnecessariamente.
O BabaCAD suporta todos os arquivos de desenho .DWG até R 2020, por isso é 100% compatível com todos os outros softwares profissionais de CAD.
Vá para a página inicial (https://www.babacad.com), baixe o software e experimente agora gratuitamente.
Desenhe uma linha, arco, círculo, retângulo, polilinha ou use ferramentas de modificação e desenhe objetos mais complexos, como blocos, spline, hachura e assim por diante.
Agrupe objetos usando blocos, camadas e escolha entre diferentes pesos e tipos de linha.
Importe blocos de uma enorme biblioteca de blocos em arquivos DWG e DXF que podem ser encontrados na Internet.
No final, desenhe cotas, anotações, texto, insira imagens rasterizadas e muito mais.
Existem vários tutoriais em vídeo na página inicial, iniciados pela criação de uma planta 2D simples em CAD, importação de esboços, plotagem em escala usando layouts e muito mais.
Se você deseja iniciar a modelagem CAD em 3D, existe a versão 3D Enterprise com as ferramentas básicas de modelagem 3D sólidas, como Extrusão, Filete, Chanfro, Furos, etc.
A versão corporativa pode ser estendida com seus próprios comandos e funções programando os módulos do BabaCAD .NET AddOn usando VisualBasic ou C # e .NET Components no Microsoft Visual Studio. Projetos de amostra estão incluídos no pacote.
Para ser más precisos, es casi 100% gratis (podemos decir 95% gratis). ¿Como puede ser?
Es por el hecho de que este CAD es aproximadamente veinte veces más barato que las otras herramientas CAD profesionales.
Bueno, Auto CAD es el mejor de su clase, pero si puede comprar un CAD profesional por 1/20 del precio de prof. CAD y abrir / editar archivos de CAD (DWG, DXF), y si puede terminar todo el trabajo, ¿por qué? ¿Alguien gastaría dinero innecesariamente?
BabaCAD admite todos los archivos de dibujo .DWG hasta R 2020, por lo que es 100% compatible con todos los demás software CAD profesionales.
Vaya a la página de inicio (https://www.babacad.com), descargue el software y pruébelo ahora de forma gratuita.
Dibuje una línea, un arco, un círculo, un rectángulo, una polilínea o use herramientas de modificación y dibuje objetos más complejos como bloques, splines, sombreados, etc.
Agrupe objetos usando bloques, capas y elija entre diferentes pesos de línea y tipos de línea.
Importe bloques de una gran biblioteca de bloques en archivos DWG y DXF que se pueden encontrar en Internet.
Al final, dibuje dimensiones, anotaciones, texto, inserte imágenes ráster y mucho más.
Hay varios tutoriales en video en la página de inicio, comenzando por hacer un simple plano 2D en CAD, importar bocetos, trazar en escala usando diseños y mucho más.
Si desea comenzar el modelado CAD en 3D, hay una versión 3D Enterprise con las herramientas básicas de modelado sólido 3D como Extrusión, Filete, Chaflán, Agujeros, etc.
La versión Enterprise se puede ampliar con sus propios comandos y funciones mediante la programación de módulos de complementos .NET de BabaCAD utilizando VisualBasic o C # y componentes .NET en Microsoft Visual Studio. Se incluyen proyectos de muestra en el paquete.
Pour être plus précis, c’est presque 100% gratuit (peut-on dire 95% gratuit). Comment ça peut être?
C’est parce que cette CAO est environ vingt fois moins chère que les autres outils de CAO professionnels.
Eh bien, Auto CAD est le meilleur de la classe, mais si vous pouvez acheter un CAO professionnel pour 1/20 du prix prof CAD et ouvrir / modifier des fichiers CAD (DWG, DXF), et si vous pouvez terminer tout le travail, alors pourquoi quelqu’un gaspillerait-il de l’argent inutilement?
BabaCAD prend en charge tous les fichiers de dessin .DWG jusqu’à R 2020, il est donc 100% compatible avec tous les autres logiciels de CAO professionnels.
Accédez à la page d’accueil (https://www.babacad.com), téléchargez le logiciel et essayez-le dès maintenant gratuitement.
Dessinez une ligne, un arc, un cercle, un rectangle, une polyligne ou utilisez des outils de modification et dessinez des objets plus complexes tels que des blocs, des splines, des hachures, etc.
Regroupez les objets à l’aide de blocs, de calques et choisissez parmi différents épaisseurs et types de lignes.
Importez des blocs à partir d’une énorme bibliothèque de blocs dans des fichiers DWG et DXF disponibles sur Internet.
À la fin, dessinez des dimensions, des annotations, du texte, insérez des images raster et bien plus encore.
Il existe de nombreux didacticiels vidéo sur la page d’accueil, à commencer par la création d’un simple plan d’étage 2D en CAO, l’importation de croquis, le traçage à l’échelle à l’aide de mises en page et bien plus encore.
Si vous souhaitez commencer la modélisation CAO en 3D, il existe une version 3D Enterprise avec les outils de modélisation de solides 3D de base tels que l’extrusion, le congé, le chanfrein, les trous, etc.
La version Entreprise peut être étendue avec vos propres commandes et fonctions en programmant des modules BabaCAD .NET AddOn à l’aide des composants VisualBasic ou C # et .NET dans Microsoft Visual Studio. Des exemples de projets sont inclus dans le package.
Om precies te zijn, het is bijna 100% gratis (kunnen we zeggen 95% gratis). Hoe het kan zijn?
Het is omdat deze CAD ongeveer twintig keer goedkoper is dan de andere professionele CAD-tools.
Nou, Auto CAD is de beste in de klas, maar als je een professionele CAD kunt kopen voor 1/20 van de prijs van prof. CAD en CAD-bestanden (DWG, DXF) kunt openen / bewerken, en als je al het werk kunt voltooien, waarom dan zou iemand onnodig geld verspillen?
BabaCAD ondersteunt alle .DWG-tekenbestanden tot R 2020, dus het is 100% compatibel met alle andere professionele CAD-software.
Ga naar de startpagina (https://www.babacad.com), download de software en probeer het nu gratis.
Teken een lijn, boog, cirkel, rechthoek, polylijn of gebruik wijzigingsgereedschappen en teken complexere objecten zoals blokken, spline, arcering enzovoort.
Groepeer objecten met blokken, lagen en kies uit verschillende lijndikten en lijntypes.
Importeer blokken uit een enorme bibliotheek met blokken in DWG- en DXF-bestanden die op internet te vinden zijn.
Teken aan het einde afmetingen, annotaties, tekst, voeg rasterafbeeldingen in en nog veel meer.
Er zijn een aantal video-tutorials op de startpagina, begonnen met het maken van een eenvoudige 2D-plattegrond in CAD, het importeren van schetsen, het plotten van schaal met lay-outs en nog veel meer.
Als u CAD-modellering in 3D wilt starten, is er een 3D Enterprise-versie met de standaard 3D-modelleringstools zoals Extrude, Fillet, Chamfer, Holes etc.
Enterprise-versie kan worden uitgebreid met uw eigen opdrachten en functies door BabaCAD .NET AddOn-modules te programmeren met VisualBasic of C # en .NET-componenten in Microsoft Visual Studio. Voorbeeldprojecten zijn inbegrepen in het pakket.
Genauer gesagt ist es fast 100% kostenlos (können wir sagen 95% kostenlos). Wie es sein kann?
Dies liegt an der Tatsache, dass dieser CAD etwa zwanzigmal billiger ist als die anderen professionellen CAD-Tools.
Nun, Auto CAD ist das beste in der Klasse, aber wenn Sie ein professionelles CAD für 1/20 des prof. CAD-Preises kaufen und CAD-Dateien (DWG, DXF) öffnen / bearbeiten können und wenn Sie alle Arbeiten abschließen können, warum dann? würde jemand unnötig Geld verschwenden.
BabaCAD unterstützt alle .DWG-Zeichnungsdateien bis R 2020 und ist daher zu 100% mit allen anderen professionellen CAD-Programmen kompatibel.
Gehen Sie zur Startseite (https://www.babacad.com), laden Sie die Software herunter und testen Sie sie jetzt kostenlos.
Zeichnen Sie eine Linie, einen Bogen, einen Kreis, ein Rechteck, eine Polylinie oder verwenden Sie Änderungswerkzeuge und zeichnen Sie komplexere Objekte wie Blöcke, Spline, Schraffur usw.
Gruppieren Sie Objekte mithilfe von Blöcken, Ebenen und wählen Sie aus verschiedenen Strichstärken und Linientypen.
Importieren Sie Blöcke aus einer riesigen Bibliothek von Blöcken in DWG- und DXF-Dateien, die im Internet zu finden sind.
Zeichnen Sie am Ende Bemaßungen, Anmerkungen, Text, fügen Sie Rasterbilder ein und vieles mehr.
Auf der Startseite finden Sie eine Reihe von Video-Tutorials, die mit der Erstellung eines einfachen 2D-Grundrisses in CAD, dem Importieren von Skizzen, dem Zeichnen im Maßstab mithilfe von Layouts und vielem mehr beginnen.
Wenn Sie mit der CAD-Modellierung in 3D beginnen möchten, gibt es eine 3D Enterprise-Version mit den grundlegenden 3D-Volumenmodellierungswerkzeugen wie Extrudieren, Verrunden, Anfasen, Löchern usw.
Die Enterprise-Version kann mit Ihren eigenen Befehlen und Funktionen erweitert werden, indem BabaCAD .NET AddOn-Module mit VisualBasic oder C # – und .NET-Komponenten in Microsoft Visual Studio programmiert werden. Beispielprojekte sind im Paket enthalten.
There is 100% free (version 2017) version but you can also get version 2020 Home Edition.
Fact is that this CAD is about twenty times cheaper than the other professional CAD tools, but no less of quality.
Well, Auto CAD is the best in the class, but if you can buy a professional CAD for 1/20 of the price, open/edit CAD files (DWG, DXF), and if you can finish all the work, then why would anyone waste money unnecessarily.
BabaCAD supports all .DWG drawing files up to R 2020, so it’s 100% compatible with all other professional CAD software.
Go to the start page (https://www.babacad.com), download the software and try it right now for free.
Draw a line, arc, circle, rectangle, polyline, or use modify tools and draw more complex objects like blocks, spline, hatch and so on.
Group objects using blocks, layers and choose from different line weights and line types.
Import blocks from huge library of blocks in DWG and DXF files that can be found on the internet.
At the end, draw dimensions, annotations, text, insert raster images and much more.
There are number of video tutorials on the home page, started from making a simple 2D floor plan in CAD, importing sketches, plotting in scale using layouts and much more.
If you want to start CAD modeling in 3D, there is 3D Enterprise version with the basic 3D solid modeling tools like Extrude, Fillet, Chamfer, Holes etc.
Enterprise version can be extended with your own commands and functions by programming BabaCAD .NET AddOn modules using VisualBasic or C# and .NET Components in Microsoft Visual Studio. Sample projects are included in the package.
First, draw a rectangle object, with 6 meters width and 5 meters height. Type ‘@’ character (‘monkey’ or ‘at’ email symbol), to specify that we are entering relative or offset coordinates.
We will type ‘@’, then type ’6′, then ‘comma’, then type ’5′, and click enter to finish rectangle command.
Now, let’s draw rooms. I will make a floor plan with a hall, one dining room,kitchen and toilet. It should fit to overall floor dimension of 6 times 5 meters.
To draw room space, I will use line object. Click on the line command, and then specify desired length.
Enter the value, 4, then at 90 degrees, enter value of 3, so we will have living room sized 4 times 3 meters.
I will draw and other lines to finish wall paths.
Then, we can check the size of every room, and as we can see, we have living room of size 4 times 3 meters.
Then, kitchen has size of 2 times 3 meters, and later we will also draw a toilet with the length of 2.5 meters.
After we finished this, now we can use offset command, to draw walls.
But, before starting with offset, we will first join specific lines, so we can later use offset command to draw a walls.
To join lines, select two lines and use join command, and lines will be joined.
We must draw some lines again, following existing lines, and using snap on end-point feature.
Then, repeat join command again, and join lines which are left.
We need a toilet, so I will choose a length of 2.5 meters.
I have to draw a line with length of 0.5 using line command.
After that, start line and connect with the wall down below, using orthogonal snap feature.
Erase lines that are not needed. Just select, and type erase, or click on erase button in the menu.
We will get the space for the toilet, which size is 3 meters in width and 2.5 meters in length.
So, we’ve drawn basic stuff, and as you can see, it already getting some nice look of CAD floor plan.
There are few lines to join, as we need them joined to draw the walls.
Few lines a left to join.
Just select two lines, and type join command to join the lines.
If some line or other object can’t be selected, just modify objects draw order, using command, send to back.
After we join all these lines, we will have separate poly lines, and then I will show you how to use offset command, to draw walls with specific width.
We have prepared everything to switch to the next step.
That next step is drawing of walls, using offset command.
Command, offset, can be started by typing offset, in the command line, or by clicking on the menu button.
After we started offset command, we need to type offset value in the command line, and press the enter key.
After specifying offset value, we need to select the poly line object from which the offset line will be drawn.
Latest step in the offset command is to click on the side on which we want offset to be drawn.
We need to specify 0.075 as a offset value, because it’s half of the wall’s width.
We are almost done with drawing the walls.
I just need to prepare and join lines for the other walls.
As I couldn’t select poly line of living room, I must use send to back to get my poly line at the front, so I can then select it and use offset to draw the inner side of the wall.
All walls are drawn, except last one.
I have to send to back poly line in order to get poly line which I need to draw a last wall.
For the offset value, I will specify 0.075, as it’s half of the wall’s width.
I will again use offset command, and select poly line which divides living room from the kitchen.
At the end, after we finish with offset command, we will have all walls drawn.
We have to erase the lines that we don’t need anymore. Just select it, and use erase command.
For the last cleaning option, I will use command, trim. Trim command will help me to cut off lines inside the walls.
These short lines are parts of wall lines, so we cannot erase them using erase command.
Trim command can be started from menu or typing in the command line.
we must select edge objects for trim command, or as the best option, just presss enter or right mouse click to specify all objects in the drawing to be edge objects.
We got clean walls after erased unwanted line links, using trim command.
We could draw dimension annotations earlier, but it’s not too late to draw them now.
We could left out some lines, which will need to draw dimensions for our floor plan, but we can draw few lines quickly.
You will later see why we need those helper lines.
To draw dimension, we can use few types of dimension objects. For our floor plan, we need to use linear dimension.
Dimension commands can be found in Home menu, or in Annotations menu.
Start dimension command to draw a linear dimension, and to get annotations for every floor side.
We see that our dimensions looks too large.
This is not a problem, and we will solve this by modifying the dimension style.
In the dimension style window, we can create a new dimension style or edit existing one.
Change the dimension parameters to get desired dimension look. I will scale down values to get proper dimension size on the drawing.
After we set these values once, it will be saved with our drawing objects.
To apply changes, just close dimension style window. or press OK button.
One important thing.
We must to set the dimension style which we just created to be the default one or current style. Just open dimension style window, select floor-plan dimension style and press button, set current.
Now, I will draw a few linear dimensions on our floor plan, to annotate the size of every room on the plan, and also to get overview of whole plan size.
To repeat the last command, just right click mouse button and choose last command, or you can press space at the command line.
We will repeat dimension command few times to draw more dimensions.
I think our dimensions are still large, so dimension style parameters should be further reduced.
I will just open dimension style window again and modify dimension style parameters a little bit.
Here is the part two of floor plan tutorial:
This is the second part of our floor plan CAD tutorial.
In this part, I’ll show you how to insert some specific blocks, and use hatch command to mark the wall area.
You can see the floor plan drawing from the first part of our CAD video tutorial.
At the first step, I’ll browse for the blocks from external CAD file. It can be D-W-G or D-X-F file.
Go to the main menu, and in the view panel, click insert button, and then hit the enter key on keyboard, or click right mouse button, to show the insert block window.
As you can see, we don’ have any blocks currently.
I’ll click on browse button to find and the file with blocks.
Now, you see that we imported blocks to our drawing.
I’ll not insert any block now, just click cancel and press escape to finish insert command.
We will use the block explorer window for block insertion.
Block explorer can be opened from the menu. Go to view, then check the block explorer check box.
You can also show the block explorer window if you type in dynamic edit box or command line.
You see that we have all our imported blocks shown in the block explorer.
Here, we have all needed blocks, from living room blocks, then kitchen and bathroom blocks, and walls and doors also.
I will first draw two helper lines. I need these lines in order to get middle points of position where to insert the window block.
To insert the window block, double click on the block in the block explorer. Then, move the cursor and click somewhere in the drawing to insert the block.
We need to select the block in the drawing and move it by using the move command. Just select lower right corner as a base point to move the window to the middle of the living room wall.
Repeat all of this steps to insert the window to the right. Again, just insert the block and use move command to move the block to the right.
Now, let’s insert the window to the kitchen. As we have middle insertion point, I can immediately insert the window to the kitchen wall.
Here is the entrance door.
I’ll insert it to the entrance of the house, and I have to rotate it by 90 degrees. I’m using tracking feature to easy rotate it.
Now, just move the block to the position for the entrance door.
Also, we have a interior door block, which is a bit smaller than entrance door.
Double click to select the interior door block, and insert it in the drawing.
We have to mirror this block, as we need opposite door opening angle.
I’ll use mirror command. For the mirror command, we have to specify two points to identify mirroring axis.
Then, just move mirrored block to the position of entrance to the living room.
Another block will we be good for the kitchen.
I just need to rotate the block by 90 degrees and to move it to the entrance position.
Only one door is left. I’ll now insert door for the bathroom.
I have to mirror the bathroom door, and I’ll do that same way as I did it before.
Again, I have to use mirror command, in order to get the right orientation of the door.
Finally, move the door to the right position, and we have doors and windows on our floor plan.
One thing is left. I’ll use the trim command to cut off the line segments which are crossing the door blocks.
Click the trim button to start trim command. You must select edge objects for trimming, but I’ll hit enter to select all.
Now, I’ll just click on these unnecessary line segments to cut it off. Trim command is very useful.
Let’s use hatch command to mark the wall area.
After the start of hatch command, we see hatch creation menu.
I’ll select the pattern and input 0.03 for the scale value.
I turned off object snap and I’m clicking interior points inside the walls.
We hatched all walls.
Scale of the hatch pattern can be smaller. I’ll just decrease the scale value to 0.02.
To finish hatch, just click on the close button in the menu or press escape key.
I’ll now insert blocks for the living room.
I need bed sitter.
I’ll insert bed sitter block in the living room.
Also, before placing the tv, I’ll draw a table for the tv. To draw table, you can use rectangle object.
Now, go and insert the tv.
Then, I’m going to insert the kitchen blocks.
First, I’ll insert an oven. There is the oven block somewhere in block explorer.
We need to rotate the block by 90 degrees.
After rotate of the block, I’ll move the block to the lower right corner of the kitchen.
Near the oven, there is a double sink block. I’ll insert the sink block.
I have to rotate the sink same as the oven block.
Sink block must be near the oven. I’m just using end to point object snap to move the block precisely.
For the kitchen, it’s only left to insert the refrigerator block.
Insert the refrigerator.
Same as before, I’ll rotate the block and move it.
This time, as we don’t have end point, I’ll first move to the near point, and then using orthogonal object snap, I’ll move the block
where it has to be.
Let’s insert the toilet block down there.
I must rotate the block by 180 degrees. Simply, I will just type 180 in the command line for command, rotate.
One block is left in the block explorer. It’s sink block for the bathroom. Insert the sink block near the toilet block.
We can use rectangle command, to draw the shower cabin.
First, I will draw a rectangle using relative input. After specifying the first point for the rectangle, I will type
e-mail symbol @ (at). Then, type rectangle width and height.
I have to input the negative values because our x and y axes are in negative direction.
Also, we need to use offset command to draw the shower cabin.
At the end, I will draw two diagonal lines to mark the shower cabin.
Finally, our floor plan is finished and it’s ready for printing.
Thank you for watching this tutorial.
Please click on subscribe button in the lower right corner to subscribe to BabaCAD channel.